
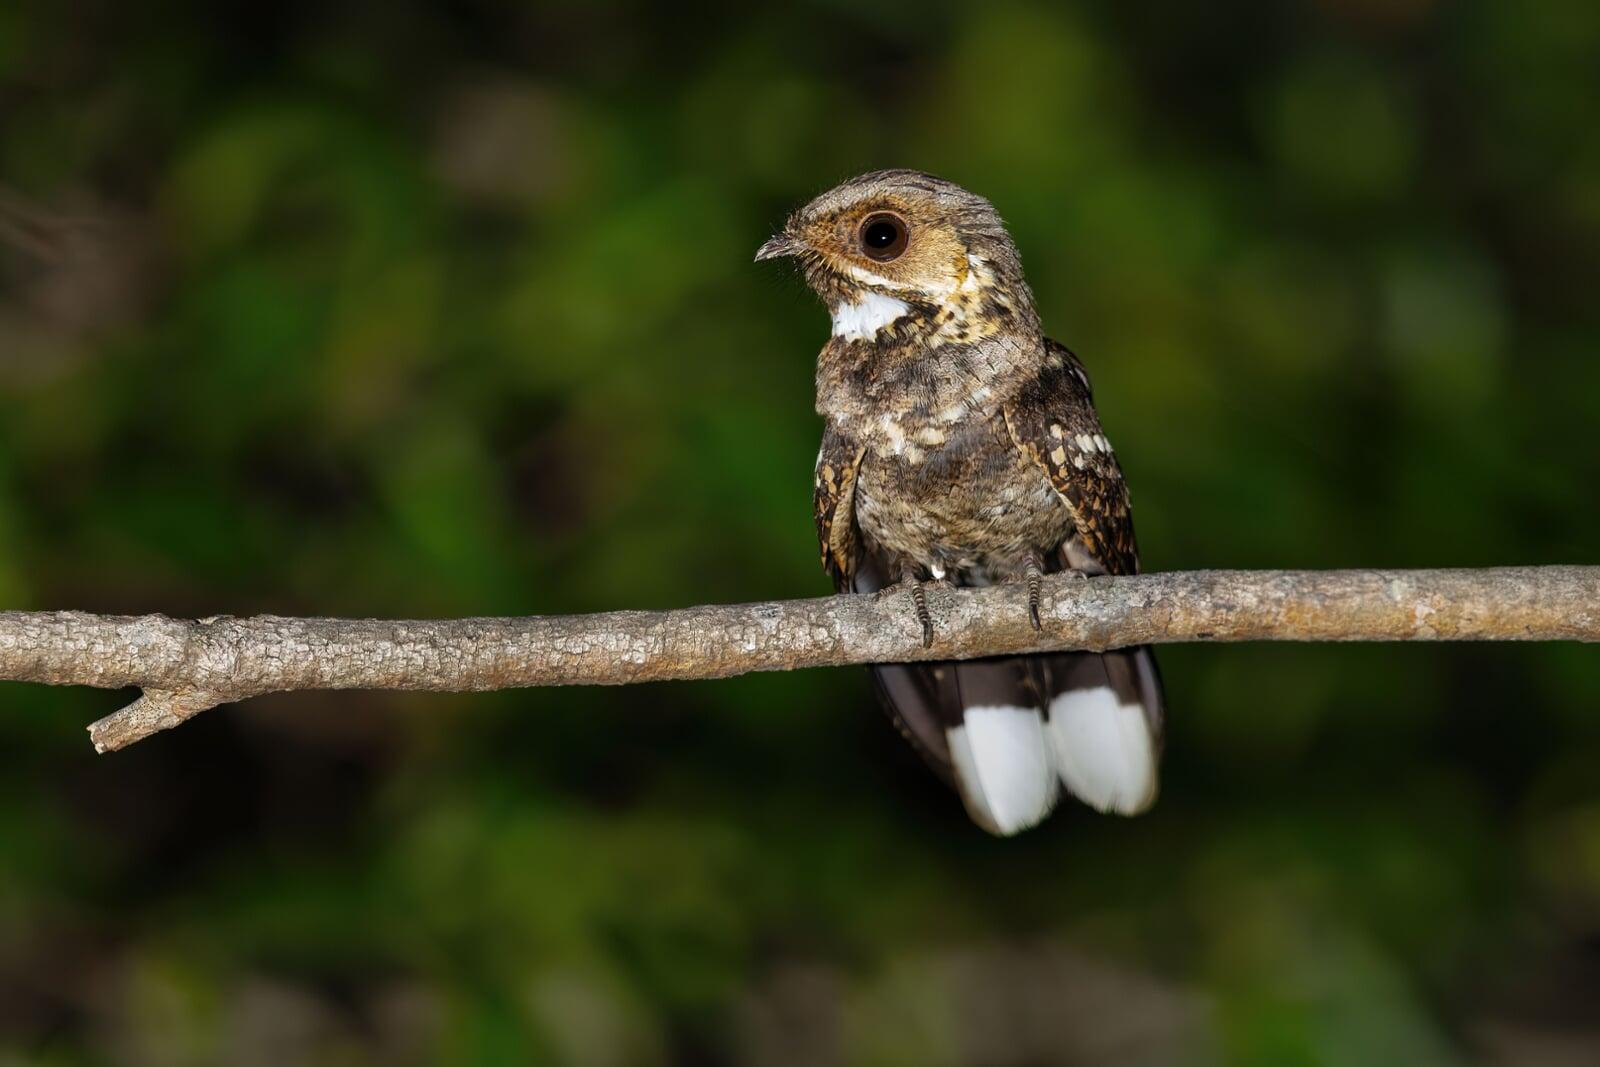
Nocturnal wildlife photography has its own kind of magic and excitement. Hours of searching, scanning the dark, and then two eyes glow back at you. The eyeshine of something alive and watching. But few things flatten that magic faster than red-eye, steel-eye, or a flat front-lit look that makes an incredible moment feel lifeless.
In this post, we’ll look at why eyeshine occurs, how you can avoid or eliminate it using off-axis flash setups, and how to remove it in post-processing if it does appear. Most of what follows applies equally to nocturnal birds and mammals.

Why eye-shine happens
Why eye-shine happens
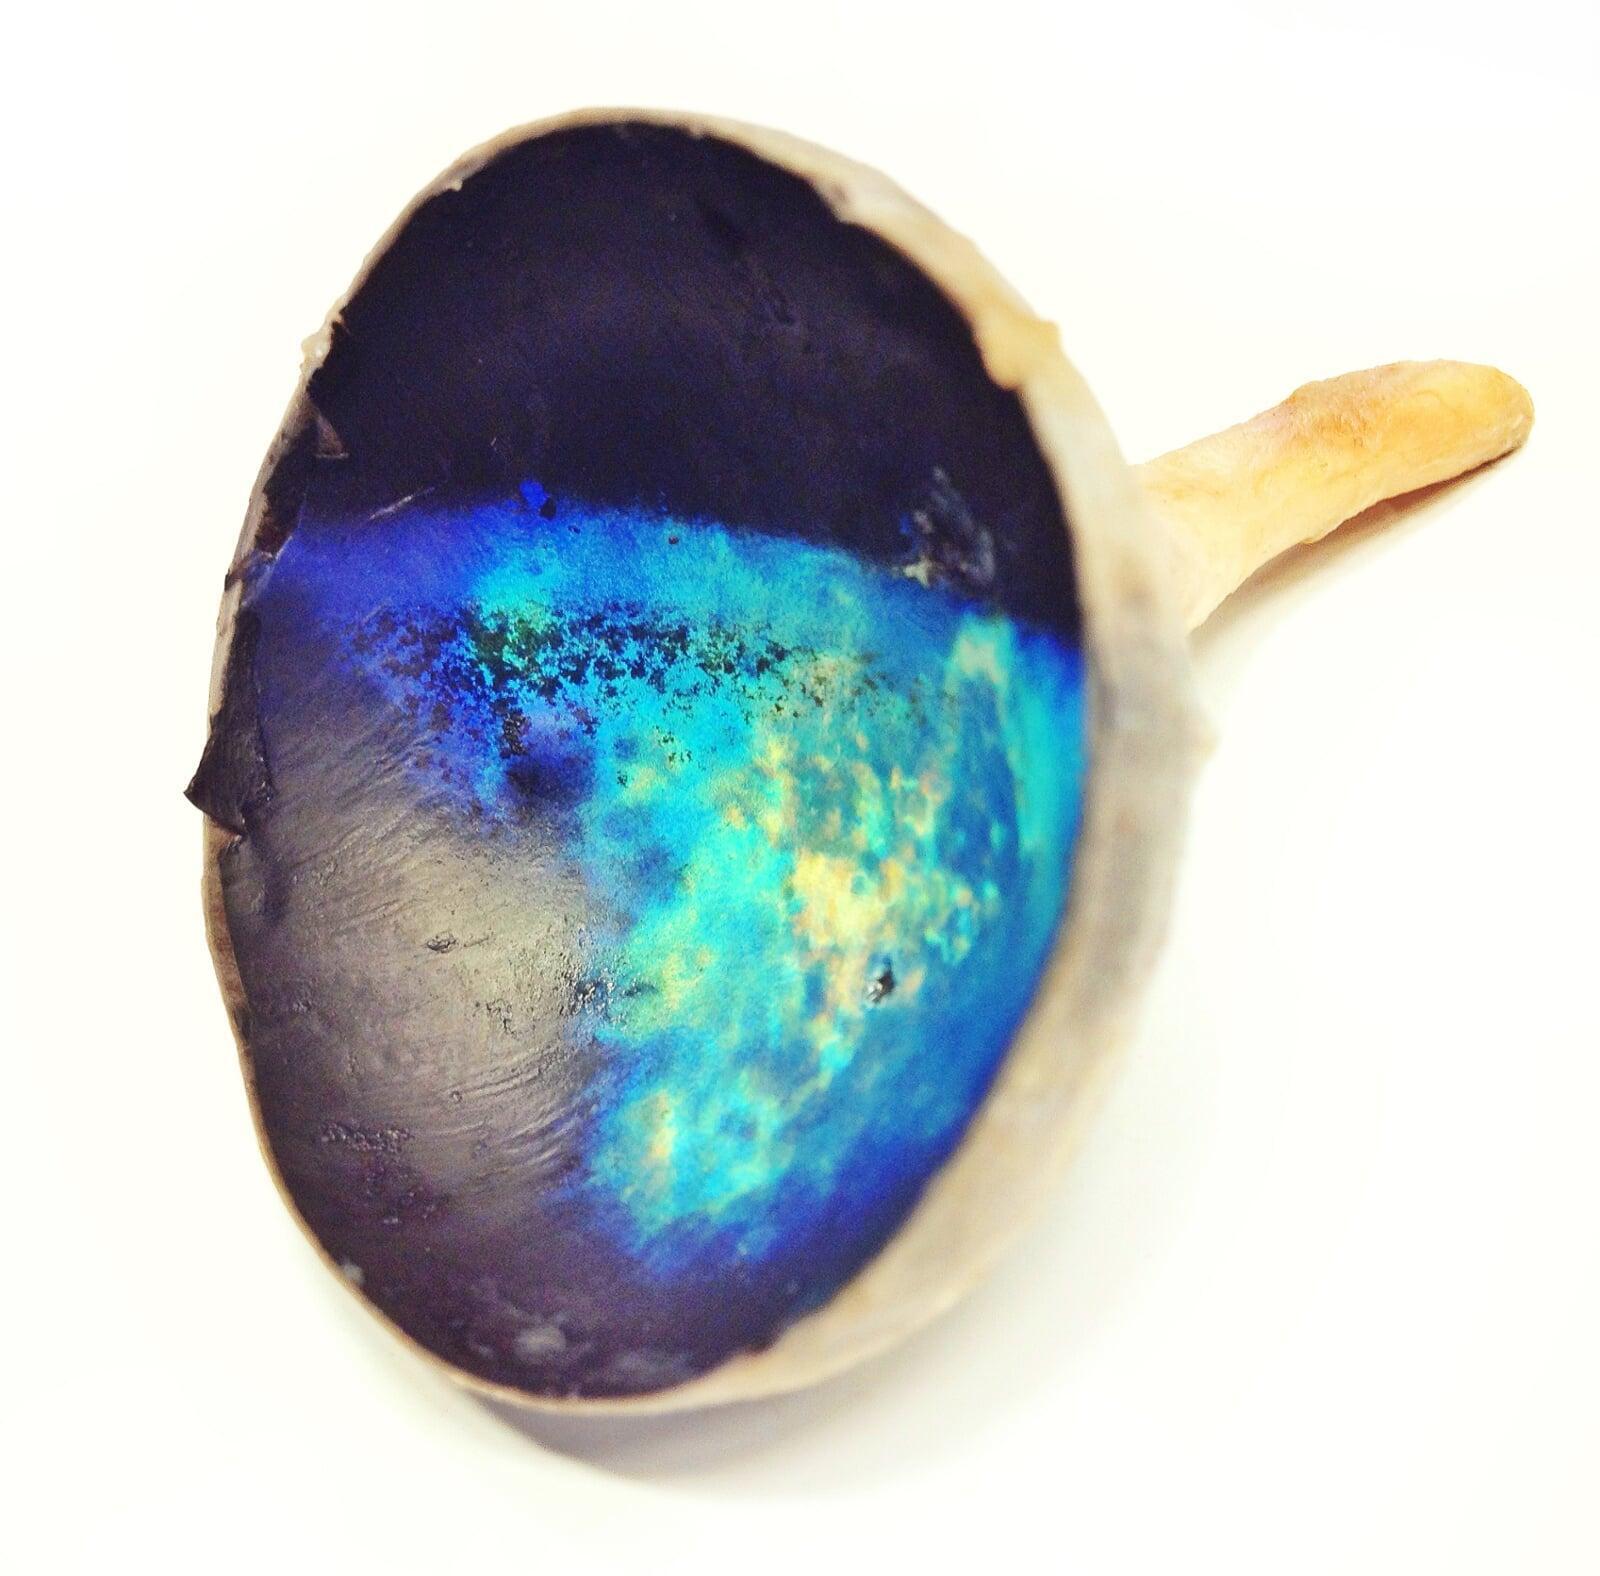
Red-eye is another common form of reflection. It occurs when light reflects off the vascular layer full of red blood in the eye. Similar to steel-eye the effect is strongest when the light is close to the optical axis. Unlike steel-eye this sort reflection is diffuse, so it occurs further off axis and is often still visible when steel-eye is not. Practically all mammals and birds will exhibit red-eye, whereas not every species will exhibit steel-eye (because not every species has a tapetum lucidum including many birds). Every species that exhibits steel-eye will exhibit some degree of red-eye when the light is placed a little further of axis. Both will disappear once the angle of the light is sufficiently wide. Both torches and flashes can cause red-eye. Because red-eye reflection is diffuse, it is generally significantly easier to correct relative to steel-eye.
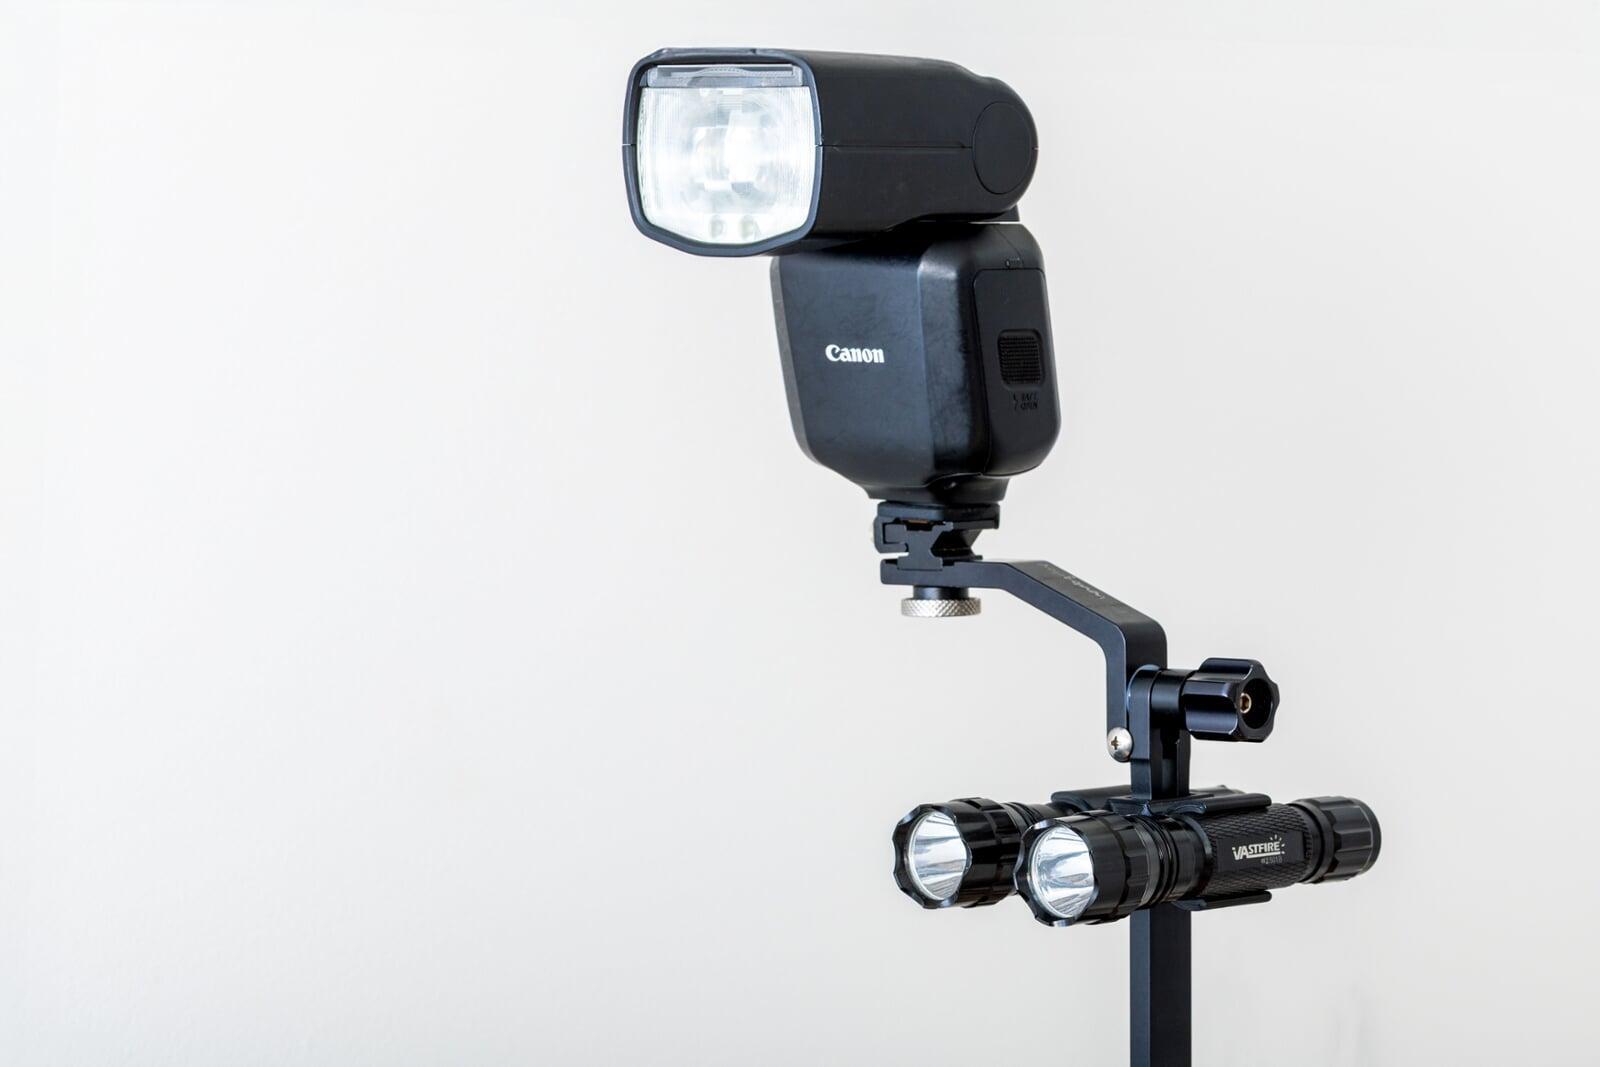
Flash Brackets
The best way to reduce eyeshine is to move your flash away from the camera's central axis so that there is an angle between the flash and end. Even a few degrees can significantly reduce eye-shine, and positioning further off axis can eliminate it (and result in more natural lighting)
A flash bracket moves your light source off the camera’s central axis, changing the angle between flash and lens. They are simple and quick to operate with a BeamMount setup - you just point the camera at the subject and shoot. Even a few degrees off-axis can greatly reduce both red-eye and steel-eye, particularly at close range where geometry matters most. However, the effect diminishes with distance, as the angle between flash and lens narrows and reflections become more pronounced and the lighting still looks quite flat relative to off axis flash.
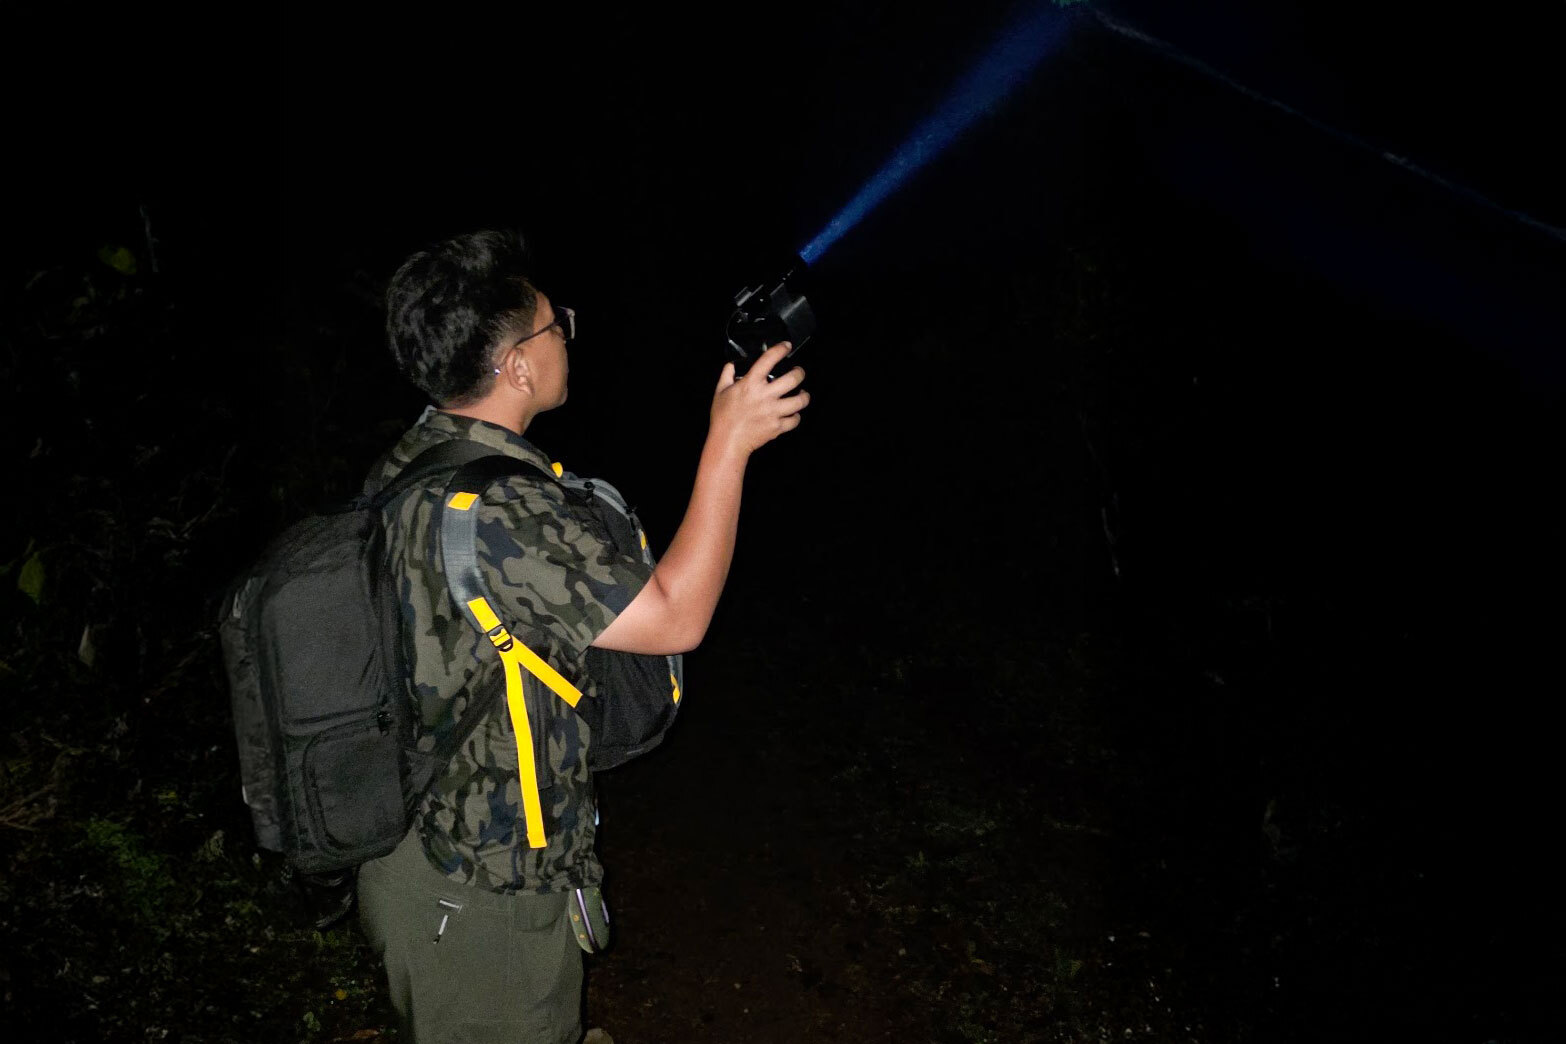
Off-Axis Flash: The Gold Standard
Positioning your flash off-axis a significant distance left or right from your lens almost always eliminates unwanted eye reflection. The idea is simple: your flash beam and lens should converge at the subject, but diverge just enough that the reflected light doesn’t come straight back.
Angles around 30–45° typically look most natural, though even 10–15° is often enough to eliminate reflections. Less is usually required to eliminate eyeshine. Note that in some circumstances such a wide angle will not be possible (for example due to occluding vegetation). In these cases eyeshine is still significantly reduced.
If solo, use a BeamMount Pro on a tall tripod or a light stand with a tilt and swivel adapter for your flash. If you have an assistant, mounting the torch with a BeamMount to the flash and asking the assistant to point the torch at the subject is the most foolproof, but of course just getting them to hold the torch and flash will work too.
Fixing Red-Eye and Steel-Eye in Photoshop
Fixing Red-Eye and Steel-Eye in Photoshop
Correcting red-eye or steel-eye is quick if you know the steps. Generally red-eye is easier to correct, and the use of flash brackets or off camera flash close to the camera will be easier to correct than flash on the camera as the red-eye or steel eye won't be as bright. The steps are the same for both steel-eye and red-eye. This section discusses how to do it photoshop, but similar techniques can be applied using other programs including Lightroom.
1. Select the affected area
Use your favourite selection tool to select the red or pale reflective patch. Expand this selection by ~2 pixels so that the borders are captured.

Choose the image saturation tool (Ctrl+U) to remove some or most of the color whilst keeping tone.

Open Curves (Ctrl + M), and raise the black point such that the specular highlight from the cornea remains but the steel-eye or red-eye is eliminated. Usually this will be just after the "hump" in the histogram - but tweak until it looks best. For severe steel eye you will need to raise the black point further and in the worst case recreate the specular highlight using a paint brush tool after this step.

Deselect, then softly blend with the Clone Stamp at 10–20% opacity or just using the blur tool. Either of th ese should be a fairly narrow radius (e.g. 10 pixels or similar). This step is optional and the effect should be subtle.
Conclusion
Working at night can be frustrating without the right equipment and techniques - endless scanning, missed focus, and reflections that ruin otherwise perfect encounters. But mastering light geometry turns those challenges into predictable, solvable problems. Once you understand how eyeshine forms, you can decide whether to use it to find your subject or eliminate it for a clean, lifelike image.
A simple off-axis flash or bracket setup - especially one that keeps your torch aligned with your flash - will make your night sessions more productive, reduce impact on the birds (because fewer shots are required to get it right) and your images more natural. Red-eye and steel-eye become just another variable you control rather than a surprise you discover later.
The next time a pair of eyes flare back at you from the dark, you’ll know exactly what’s happening - and more importantly, how to make it look the way it felt in the moment.